How to Create a Payment QR Code
A Payment QR Code allows you to instantly request or accept payments from customers or clients by sharing your payment details in a scannable format. Instead of manually sharing long account numbers or payment IDs, users can simply scan the QR code using a smartphone or payment app to complete transactions effortlessly.
With QR DM, you can enter your payment details, customize the appearance of your QR Code, and download it in your preferred format within minutes. Follow this guide to learn How to Create a Payment QR Code.
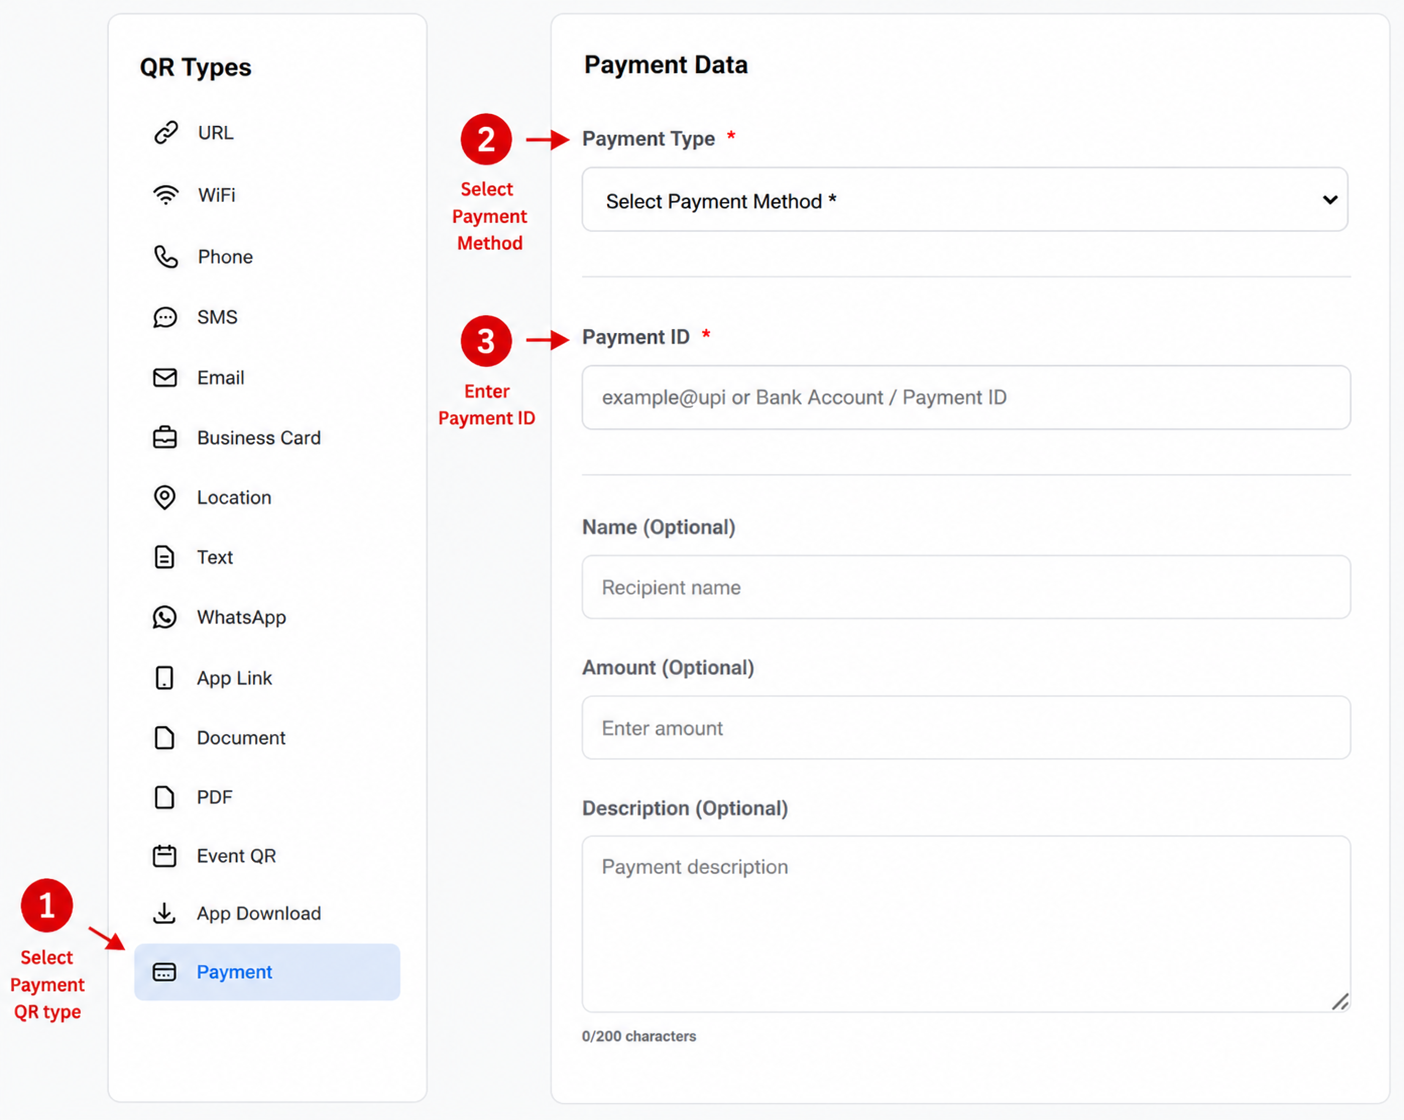
Step 1: Select the Payment QR Code Type
Begin by selecting Payment from the list of available QR code types. This opens the Payment Data section where you can enter your payment information.
In the Payment Type field, select your payment method from the dropdown list. In the Payment ID field, enter your payment handle or account details (e.g., example@upi or Bank Account / Payment ID). You can optionally fill in the Name (Optional) field for the recipient name, specify an Amount (Optional), and include a Description (Optional) for transaction details (up to 200 characters). Once entered, your payment details are ready to be converted into a QR Code.
Step 2: Customize Your Payment QR Code
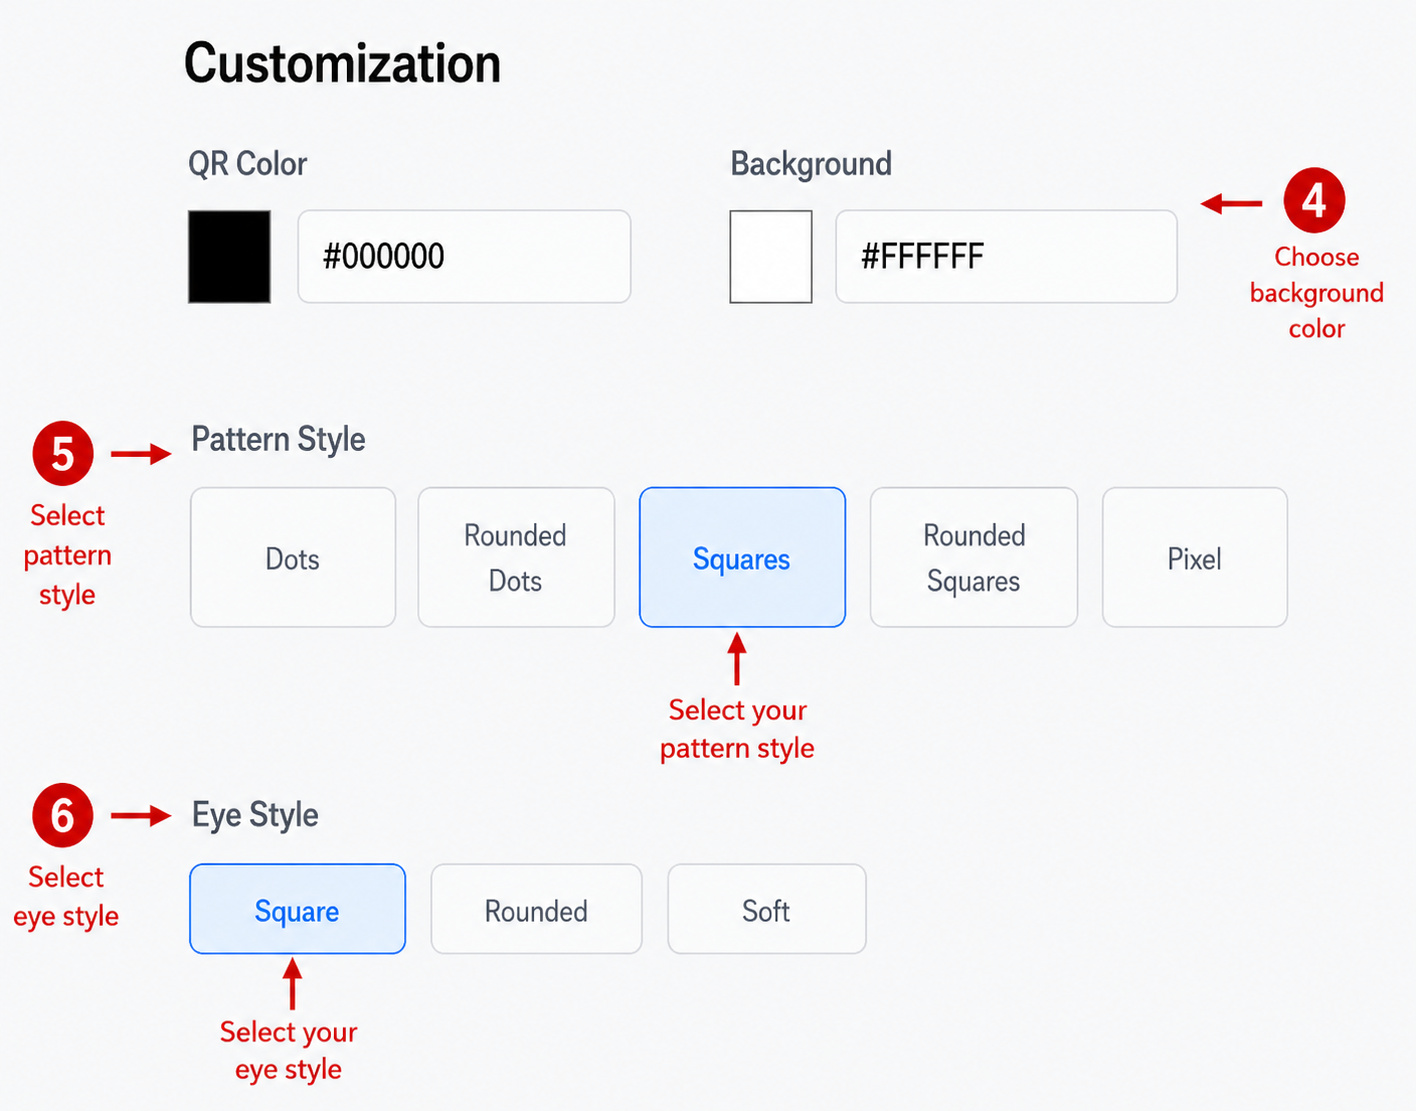
After entering your payment details, you can personalize the appearance of your QR Code to match your brand or design preferences.
The available customization options include:
- QR Color - Choose the color of your QR Code using the color picker or by entering a hexadecimal color code.
- Background Color - Select a background color that provides strong contrast for optimal scanning.
- Pattern Style - Select your preferred QR pattern design from:
- Dots
- Rounded Dots
- Squares
- Rounded Squares
- Pixel
- Eye Style - Choose the corner marker style:
- Square
- Rounded
- Soft
These customization options help create a visually appealing Payment QR Code while ensuring reliable scan performance.
Step 3: Upload a Logo (Optional)
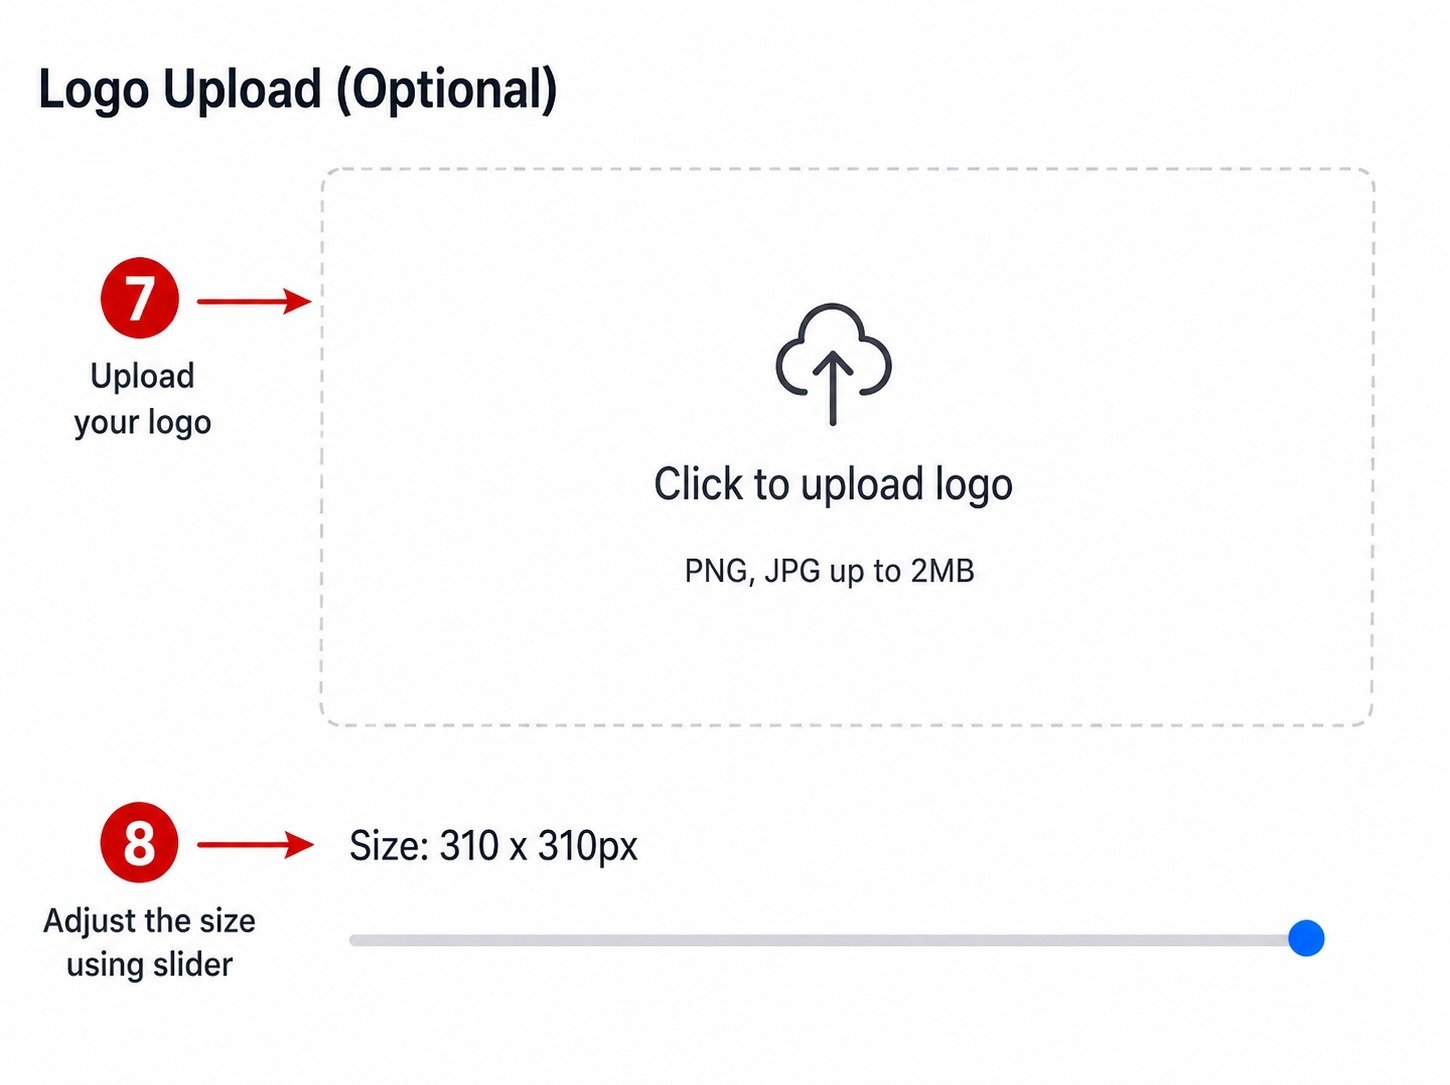
To make your Payment QR Code more recognizable and trustworthy, you can add your company, store, or brand logo.
The logo upload section supports PNG and JPG image formats with a maximum file size of 2 MB. After uploading your logo, use the size slider to adjust its size so it fits neatly within the center of the QR Code without affecting scan accuracy.
Step 4: Preview and Download Your Payment QR Code
Before downloading, review your QR Code in the Preview section to ensure everything appears correctly.
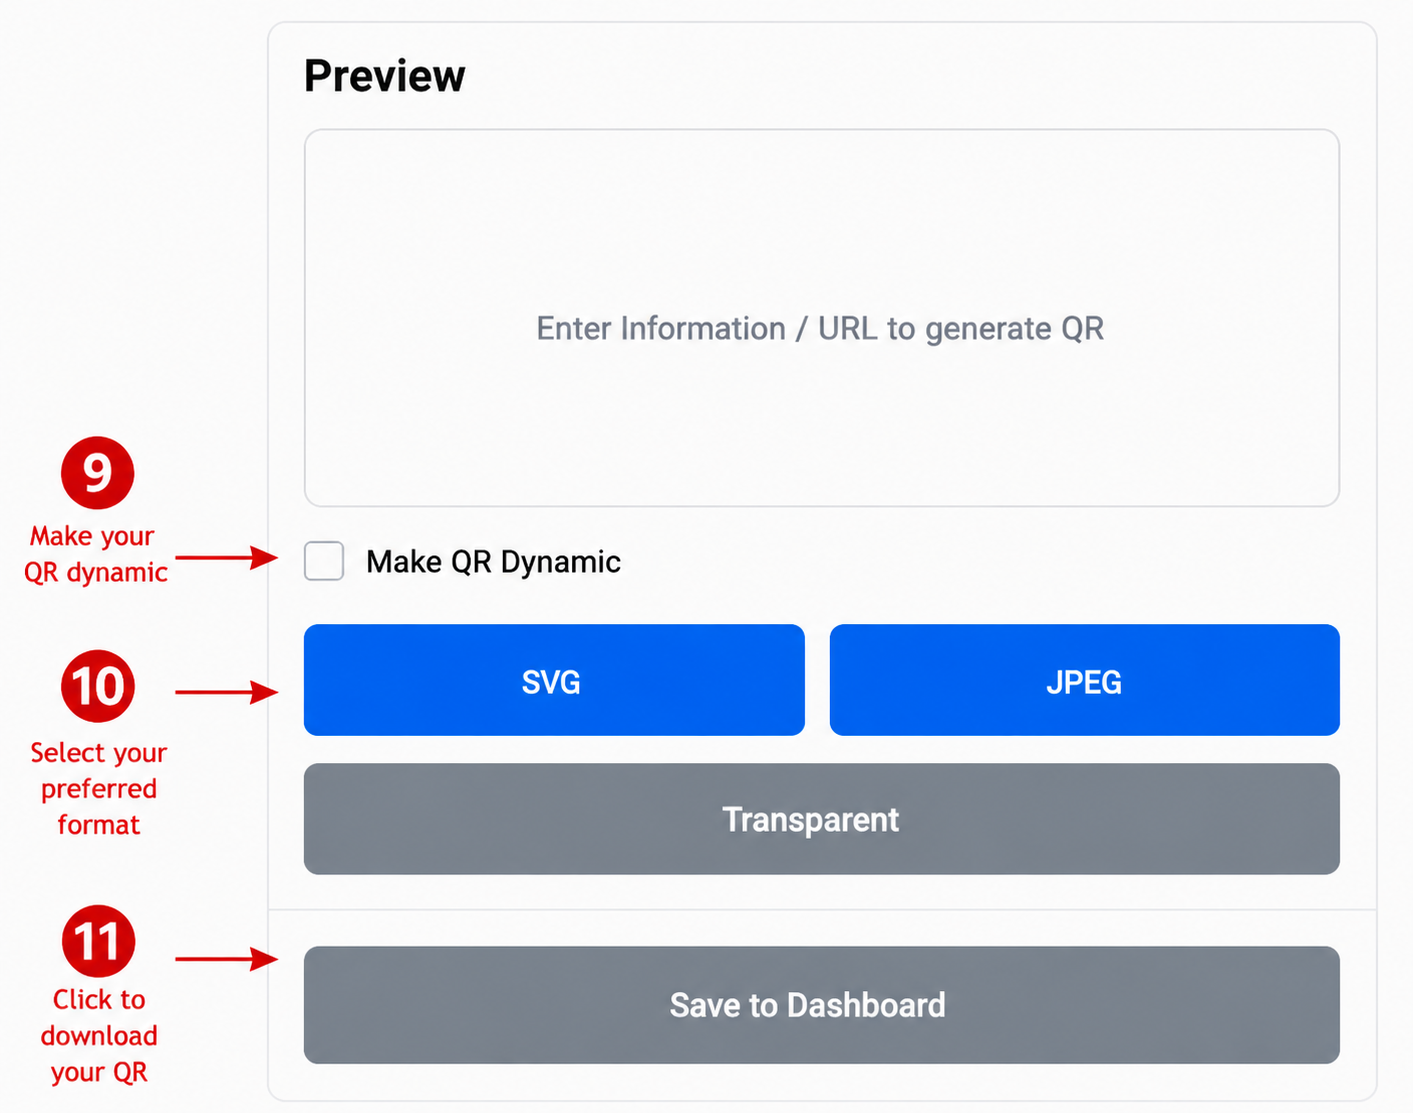
If you want the flexibility to update the linked payment details later without changing the QR Code, enable the Make QR Dynamic option.
Next, choose your preferred download format:
- SVG
- JPEG
- Transparent
Finally, click Save to Dashboard to save your Payment QR Code and download it for use in print or digital materials.
Conclusion
You have successfully learned How to Create a Payment QR Code using QR DM. Before sharing or displaying it publicly, scan the QR Code using a payment app or smartphone camera to verify that it correctly opens with the designated payment details. Once confirmed, you can confidently print your Payment QR Code on invoices, receipts, counter displays, business cards, posters, websites, or digital invoices to streamline transactions.